Hexo相关问题和优化
本文记录一些 Hexo 的难点问题及其解决方案。
Hexo相关问题和优化
环境及版本声明
本文基于以下环境及版本:
1 | hexo: 3.8.0 |
禁止爬虫跟踪外链
搜索引擎的蜘蛛来爬取文章内容时,如果你的文章中有外部链接,它就会到外链的站点去爬取,有可能再也不会回来了。为了告诉搜索引擎不要跟踪这些外链,需要在这些链接标签中添加属性 rel="nofollow" 或 rel="external nofollow" 。
rel="nofollow" 是通用格式,即是告诉搜索引擎不要跟踪此链接,rel="external nofollow" 是更具体的写法,进一步告诉搜索引擎这是一个外部的链接,不要跟踪它。
我们可以 hexo-autonofollow 插件来给外链添加 nofollow 属性,这样有利于 SEO 。
安装 hexo-autonofollow
在站点根目录下执行下列命令:
1 | npm install hexo-autonofollow --save |
编辑 站点配置文件
在 站点配置文件 _config.yml 末尾添加如下内容:
1 | # Adds nofollow attribute to all external links in your hexo blog posts automatically. |
配置后,在生成的静态文件中,例外的链接就不会被加上 nofollow 属性。
设置永久链接
链接层级过深、链接中包含中文、因为 title 变动导致链接也经常发生变动,这些都不利于 SEO 。推荐 permalink 的解决方案是使用插件 hexo-abbrlink 生成 permalink 。
安装 hexo-abbrlink
站点根目录下执行:
1 | npm install hexo-abbrlink --save |
编辑 站点配置文件
修改 站点配置文件 _config.yml 的 permalink 如下:
1 | permalink: posts/:abbrlink/ |
其中 :abbrlink 代表连接地址。可以在 站点配置文件 下添加 abbrlink 的配置(其中 alg 和 rep 分别为生成的算法和表示方式),如下:
1 | # abbrlink config |
不同配置生成的链接效果如下:
| 算法 | 进制 | 结果 |
|---|---|---|
| crc16 | hex | https://post.zz173.com/posts/3ab2.html |
| crc16 | dec | https://post.zz173.com/posts/12345.html |
| crc32 | hex | https://post.zz173.com/posts/9a8b6c4d.html |
| crc32 | dec | https://post.zz173.com/posts/1690090958.html |
执行 hexo clean && hexo g 重新生成静态文件后,源文件 front-matter 中会包含 abbrlink: xxx 。
这样不论我们的文件名、文章的 title 、文章的内容有没有发生改变,abbrlink 都不会改变,同时对搜索引擎更加友好。
CRC 全称 Cyclic Redundancy Check,又叫循环冗余校验。CRC32 跟 MD5一样都是哈希算法的一种。从 hexo-abbrlink 的源码来看,实际上它并没有利用到时间,只是利用了文章 title 来生成。
使用这种方法生成 permalink 时,在每次提交修改前,最好先执行 hexo clean && hexo g,确保提交前你所有的文章的 front-matter 中都包含 abbrlink ,避免因 title 的改变导致生成 abbrlink 不一致(如果已存在 abbrlink,就不会重新生成,不论 title 是否发生变化)。
分类存放文章源文件
Hexo 默认所有的文章都会放在 source/_posts 文件夹下,当文章越来越多时,将很难管理文章源文件同时也不利于快速查找到想要的文章。
我个人的做法就是分层分类存放,同时利用上面提到的 abbrlink 来设置 permalink,以确保不管文章源文件如何变换分类、分类层次有多深,生成的静态页面的链接始终对 SEO 友好。
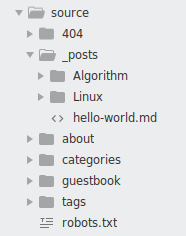
例如,在 _posts 文件夹,创建了 Algorithm 和 Linux 两个文件夹作为一级分类, Linux 分类下创建了 command 文件夹作为二级分类:
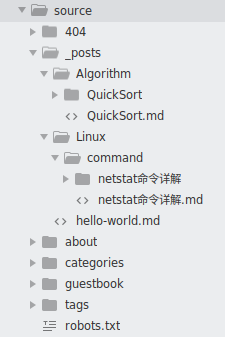
其中,文章的同名同级的文件夹是它的资源文件夹,存放文章对应的资源,如图片等。
本地运行测试,查看文章 QuickSort 如下:
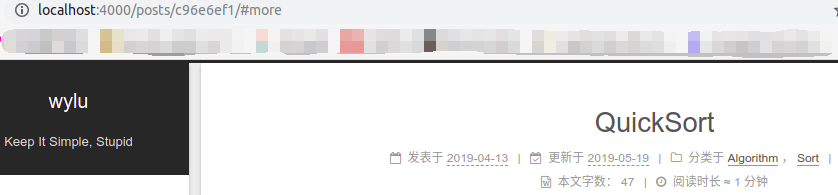
不管源文件如何存放,链接始终是 /posts/xxxxxxx/ 的形式,另外需要注意 文章 front-matter 中的 categories 与这里的分类存放没有任何关系 ,如上图中 QuickSort 文章分类于 Algorithm -> Sort,而其 md 文件是直接放在了 Algorithm 目录下。
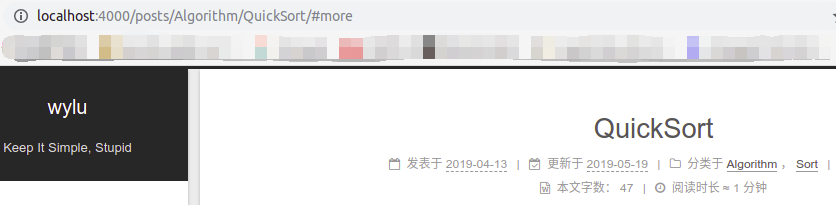
如果你想让 URL 直接对应源文件的分类也是可以的,但不推荐这么做,编辑 站点配置文件,修改 permalink 配置如下:
1 | permalink: posts/:title/ |
重新生成,测试结果如下,注意 URL 与源文件存放位置的对应关系:
英文引号变成中文引号
引号显示异常,英文单引号 ' 双引号 ",都显示成中文单引号’ 双引号”。
方法一
因为 hexo-renderer-marked 渲染 Markdown 有很多问题,所以推荐使用方法二。
Hexo 默认使用 hexo-renderer-marked 作为 Markdown 的解析引擎,它的 smartypants 配置项默认为 true,只需将其禁用就可以解决引号显示异常的问题。
编辑 站点配置文件,在文件末尾添加如下配置:
1 | # Prohibit English quotation marks from becoming Chinese quotation marks |
保存修改,重新生成站点,就可以正常显示了。
方法二
Hexo 默认自带的 Markdown 渲染引擎 hexo-renderer-marked 有很多不足,例如在渲染数学公式时会有很多问题,同时因为它默认开启 smartypants,导致引号显示异常,所以最好的解决方案是更换 Hexo 默认的 Markdown 渲染引擎。
这里推荐使用 hexo-renderer-pandoc,这个插件依赖于 Pandoc,具体的操作可以参考下面 "数学公式渲染"。
更换渲染引擎后,无需修改任何配置,引号的显示就是正常的。
Hexo NexT 数学公式渲染
参考:
- NexT MATH
- NexT Math Equations
- jdhao 博客 Hexo 书写 LaTeX 公式时的一些问题及解决方法
- 天空的城 博客 Hexo下mathjax的转义问题
- Peter 博客 hexo写博客
为什么要替换 Hexo 的默认 Markdown 引擎?
Hexo 默认使用 marked.js 去解析我们写的 markdown,比如一些符号,
_代表斜体,会被处理为<em>标签,比如x_i在开始被渲染的时候,处理为x<em>i</em>,这个时候 mathjax 就无法渲染成下标了。很多符号都有这个问题,比如粗体*,也是无法在 mathjax 渲染出来的,好在有替代的乘法等,包括\\同理。
目前,NexT 提供两种数学公式渲染引擎,分别为 MathJax 和 Katex,默认为 MathJax。
如果你选择使用 MathJax 进行数学公式渲染,你需要使用 hexo-renderer-pandoc 或者 hexo-renderer-kramed 这两个渲染器的其中一个。
这里推荐使用 MathJax + hexo-renderer-pandoc ,并以此为例:
本地测试
因为
hexo-renderer-pandoc依赖 Pandoc,所以首先需要安装 Pandoc,具体安装步骤参考 how to install pandoc 。站点根目录下执行下列命令,卸载原有的渲染器
hexo-renderer-marked,然后安装hexo-renderer-pandoc:
1 | npm uninstall hexo-renderer-marked --save |
1 | npm install hexo-renderer-pandoc --save |
- 编辑
主题配置文件,修改配置如下:
1 | # Math Equations Render Support |
- 重新生成并测试:
1 | hexo clean && hexo g && hexo s -o |
Travis CI 配置
因为 hexo-renderer-pandoc 依赖 Pandoc,所以 Travis CI 中也要安装 Pandoc,而且最好安装较新的版本,比较旧的版本如 1.19.X 可能解析出错。
在 .travis.yml 中添加类似配置,参考 installing-packages-without-an-apt-repository:
1 | before_install: |
完整配置可参考 wylu.github.io/.travis.yml
文章更新时间异常
方法一:使用 updated 属性
推荐使用方法二,避免手动操作。
当使用 Travis CI 自动部署时,发现部署成功后,所有文章的更新时间都变成了此次提交修改的时间,但有些文章在上一次提交后是没有发生过任何修改的。另外,本地测试显示的更新时间是正常的。
这是因为 git 在推送更新时,并不记录保存文件的访问时间、修改时间等元信息,所以每次使用 git 把项目 clone 下来时,文件的时间都是克隆时的时间。又因为如果没有在 front-matter 中指定 updated,Hexo 会默认使用文件的最后修改时间作为文章的更新时间,所以会出现所有文章的更新时间都发生变化的情况。
总的来说,使用 git clone 下来的文件的时间都不是原来文件的时间,而 Travis CI 每次都需要 clone 源码才能进行后面的生成和部署操作,所以目前如果想正确显示更新时间,可以在 front-matter 中指定,或者改用本地手动推送部署。
下面是一个 python 脚本,用来向 front-matter 中插入最后修改时间。
1 | #!/usr/bin/env python |
指定 _post 文件夹路径,可批量操作,如:
1 | python post_util.py /home/yourname/hexo/source/_post |
如果 front-matter 中已存在 updated,则不会覆盖。如果想重新生成,可以删掉 updated 所在的行然后重新执行。
方法二:使用 git 推送时间
参考 NexT deployment .travis.yml
在 Travis CI 的配置文件 .travis.yml 中添加如下配置:
1 | before_install: |
实际上,clone 下来的文件的时间还是克隆时的时间,然后通过上面的命令,它将 clone 下来的文件的时间改成了该文件最近一次变动的推送时间(也即文件最后一次修改的 push 时间)。